Accepting payments through HubSpot emails


Shane Rogers / February 02, 2021
8 min read

HubSpot provides a full suite of CRM tools for you to engage your customers and nurture sales.
In this post we'll review how you can use PriceBlocs payment links to remove payments friction from your email campaigns helping your business to drive higher revenue from one of your core channels.
Not all of your email campaigns will be sales related, but for the ones that are, you'll want to make it as easy as possible for your customers to pay you, after they've decide to purchase.
Making payments easy requires that your checkout be:
- Simple
- no long forms asking for too much information
- Optimized
- it should be a great experience on all devices
- Powerful
- Customers should be able to pay with their digital wallets like Apple Pay or Google Pay
PriceBlocs can enable all of this for you through a simple payment links. They're a one click checkout solution you can use to sell directly within email, with no special integration necessary.
Payment links help remove as much friction as possible from your customer's purchasing flow so that you can drive higher revenue from your existing channels like email
In this post we'll review how payment links can be used in any HubSpot email campaign, let's dive in.
HubSpot Payment Links
There are 3 main ways to use payment links with HubSpot, from simple links to personalization tokens, we'll outline them below:
- Simple link - use a payment link in an email CTA
- Personalization tokens - Associate the link to a specific email
Simple link
To get started with selling your products using payment links, you’ll need to create one. If you haven’t signed up yet you can do that here, but if you’re still exploring you can build a test link using the demo builder here.

Test links allow you to simulate a real checkout while using test payment details. This allows you to really experience the payment link checkout flow without using a real credit card.
-- Test payment details to use --cc: 4242 4242 4242 4242cvc: 123mm/yy: any future date
A test link will look something like this.
https://priceblocs.com/test/links/_bLNfgxub3XDMr-y-thdR
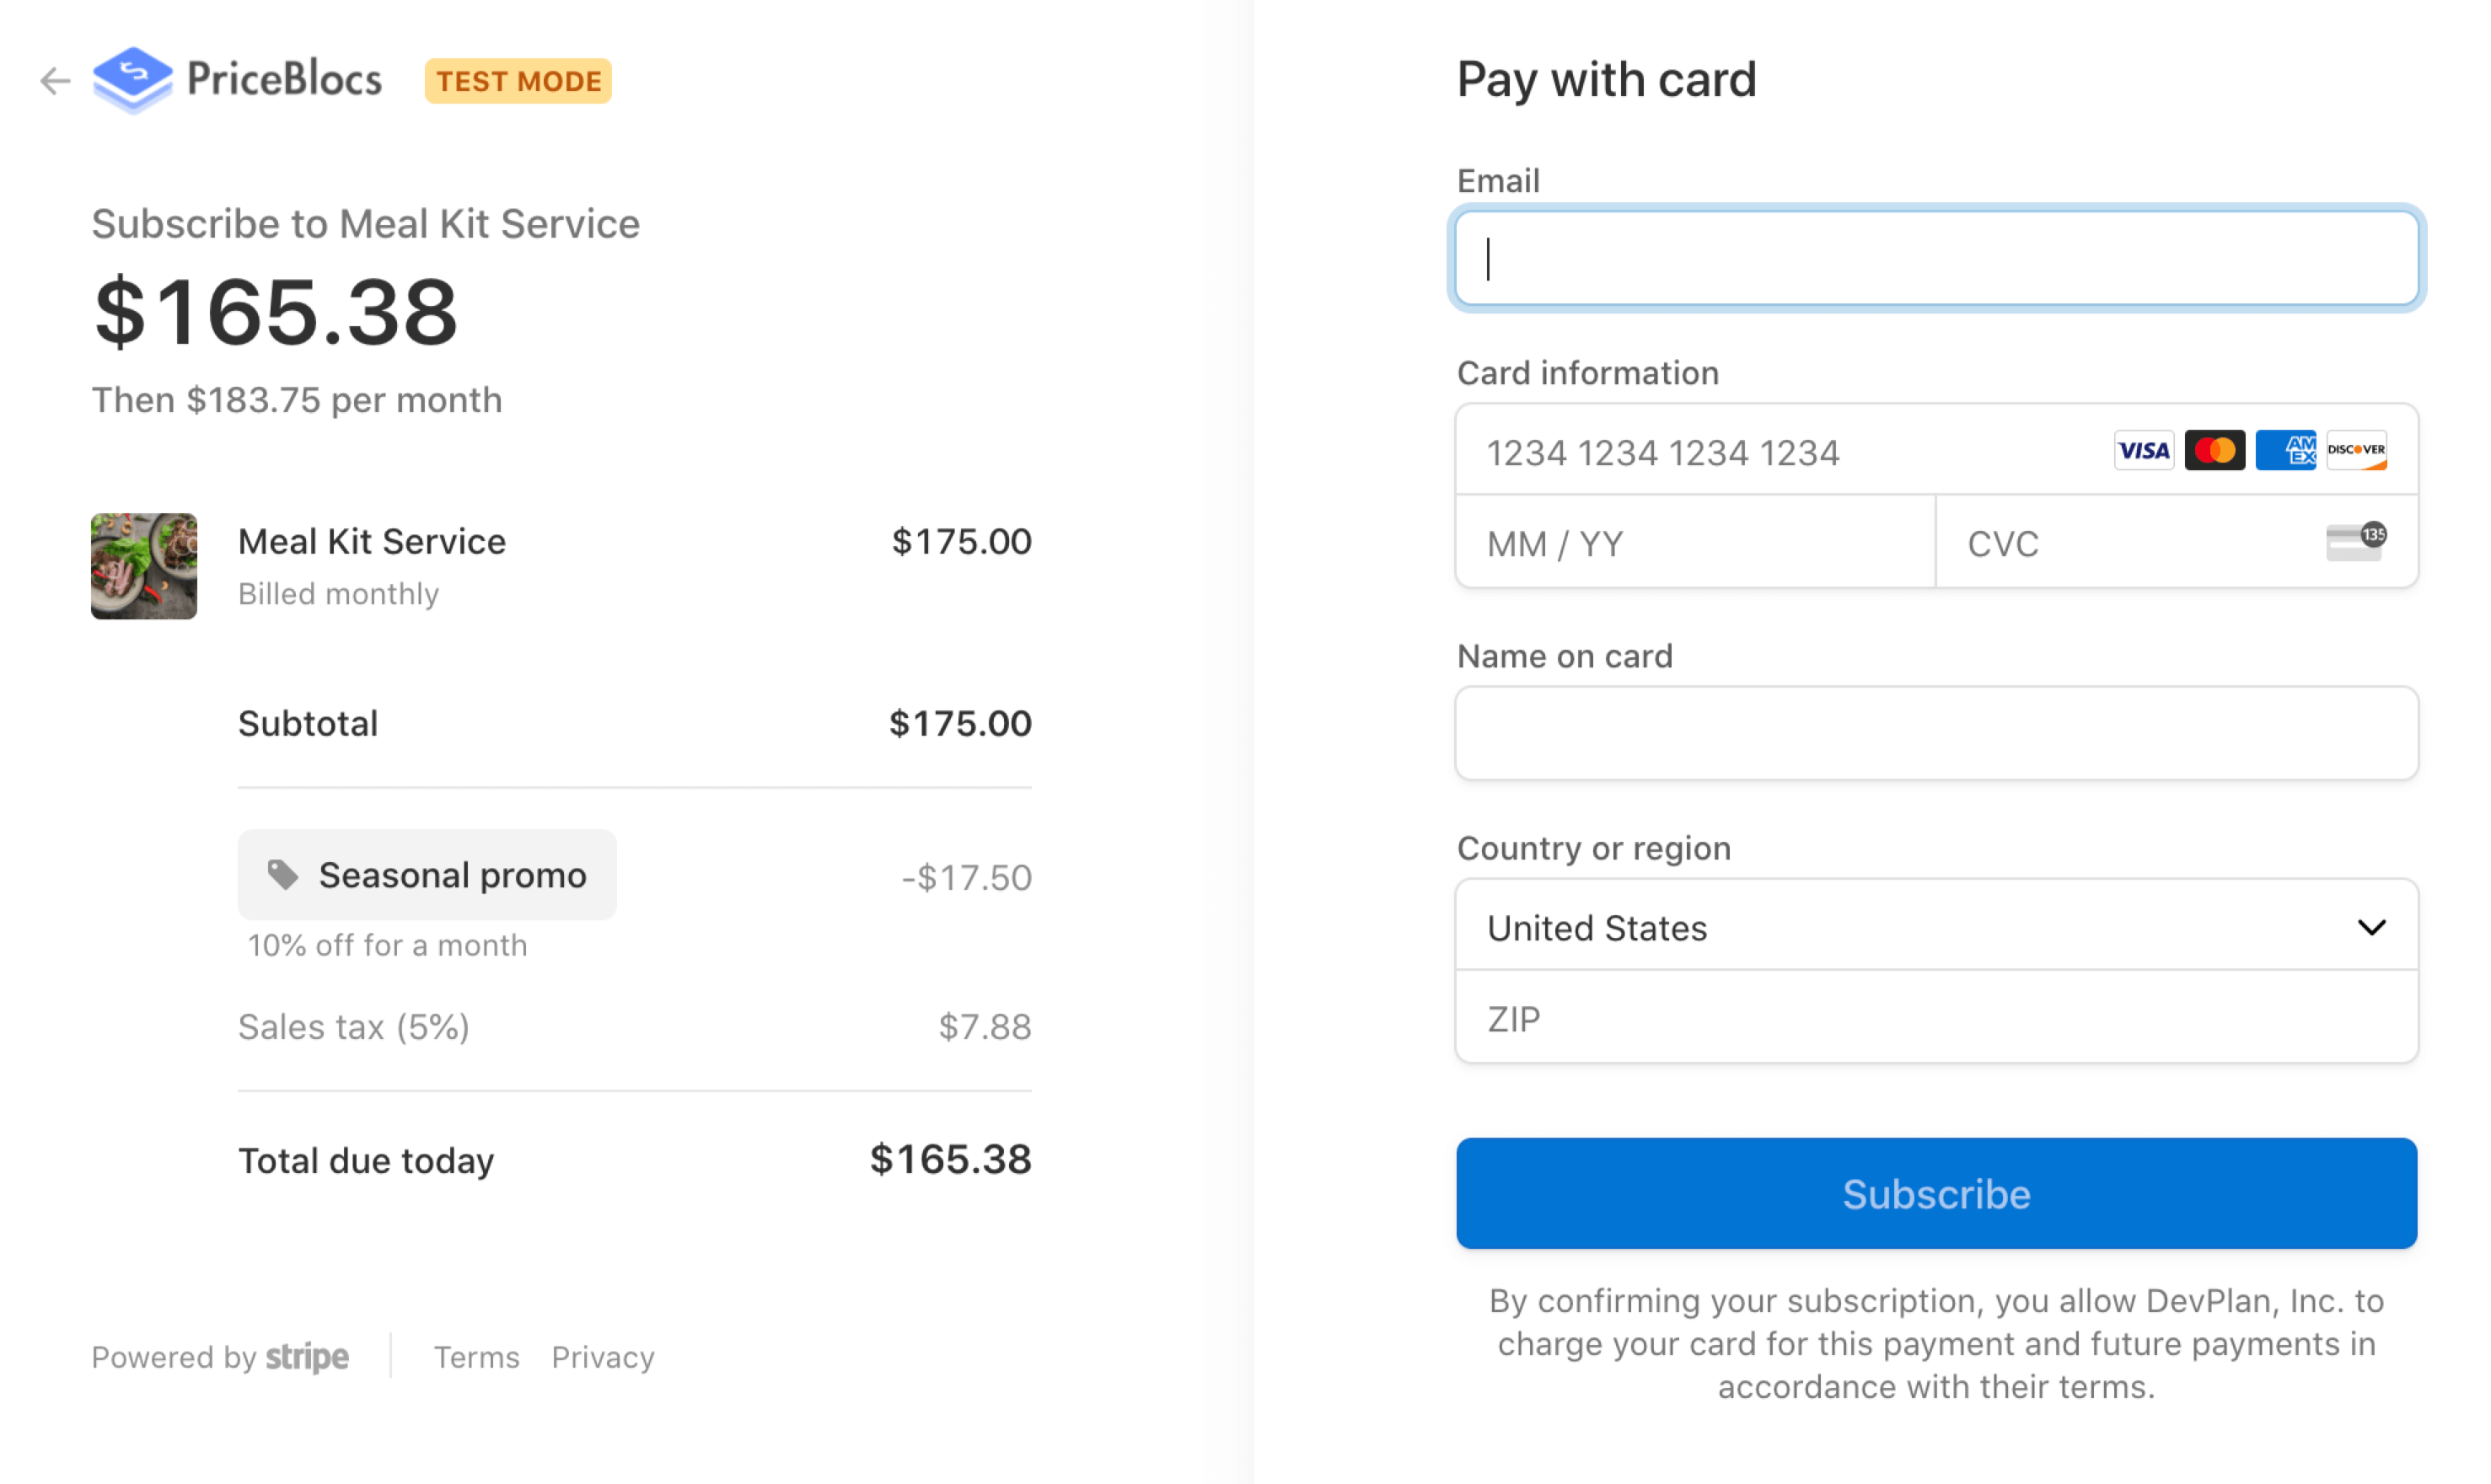
When clicked, each link will create a secure hosted checkout page which:
- Accepts all major card providers including Apple Pay and Google Pay
- Is mobile optimized, PCI compliant and SCA ready
- Is localized to the browsers language
Once you have a link, you’re ready to add it to any CTA within a HubSpot email template following these steps:
- (1) Login to HubSpot
- (2) Click on the Marketing drodown and select Email
- (3) Choose an email template (e.g Promotion)
- (4) Click on the blue CTA within the template and see the settings menu open up. Update the settings for:
- (4a) Link to: URL
- (4b) Link URL: your PriceBlocs payment link
- (4c) Button text: change this to anything you like
Here's a visual guide of those steps:
(2) Click on the Marketing drodown and select Email

(3) Choose a template

(4) Update the email CTA details

That’s it!
Let's test it
You can sending yourself a test email by using the dropdown menu in the top right hand corner. Click on:
- Send test email
- Set the recipients
- Send!
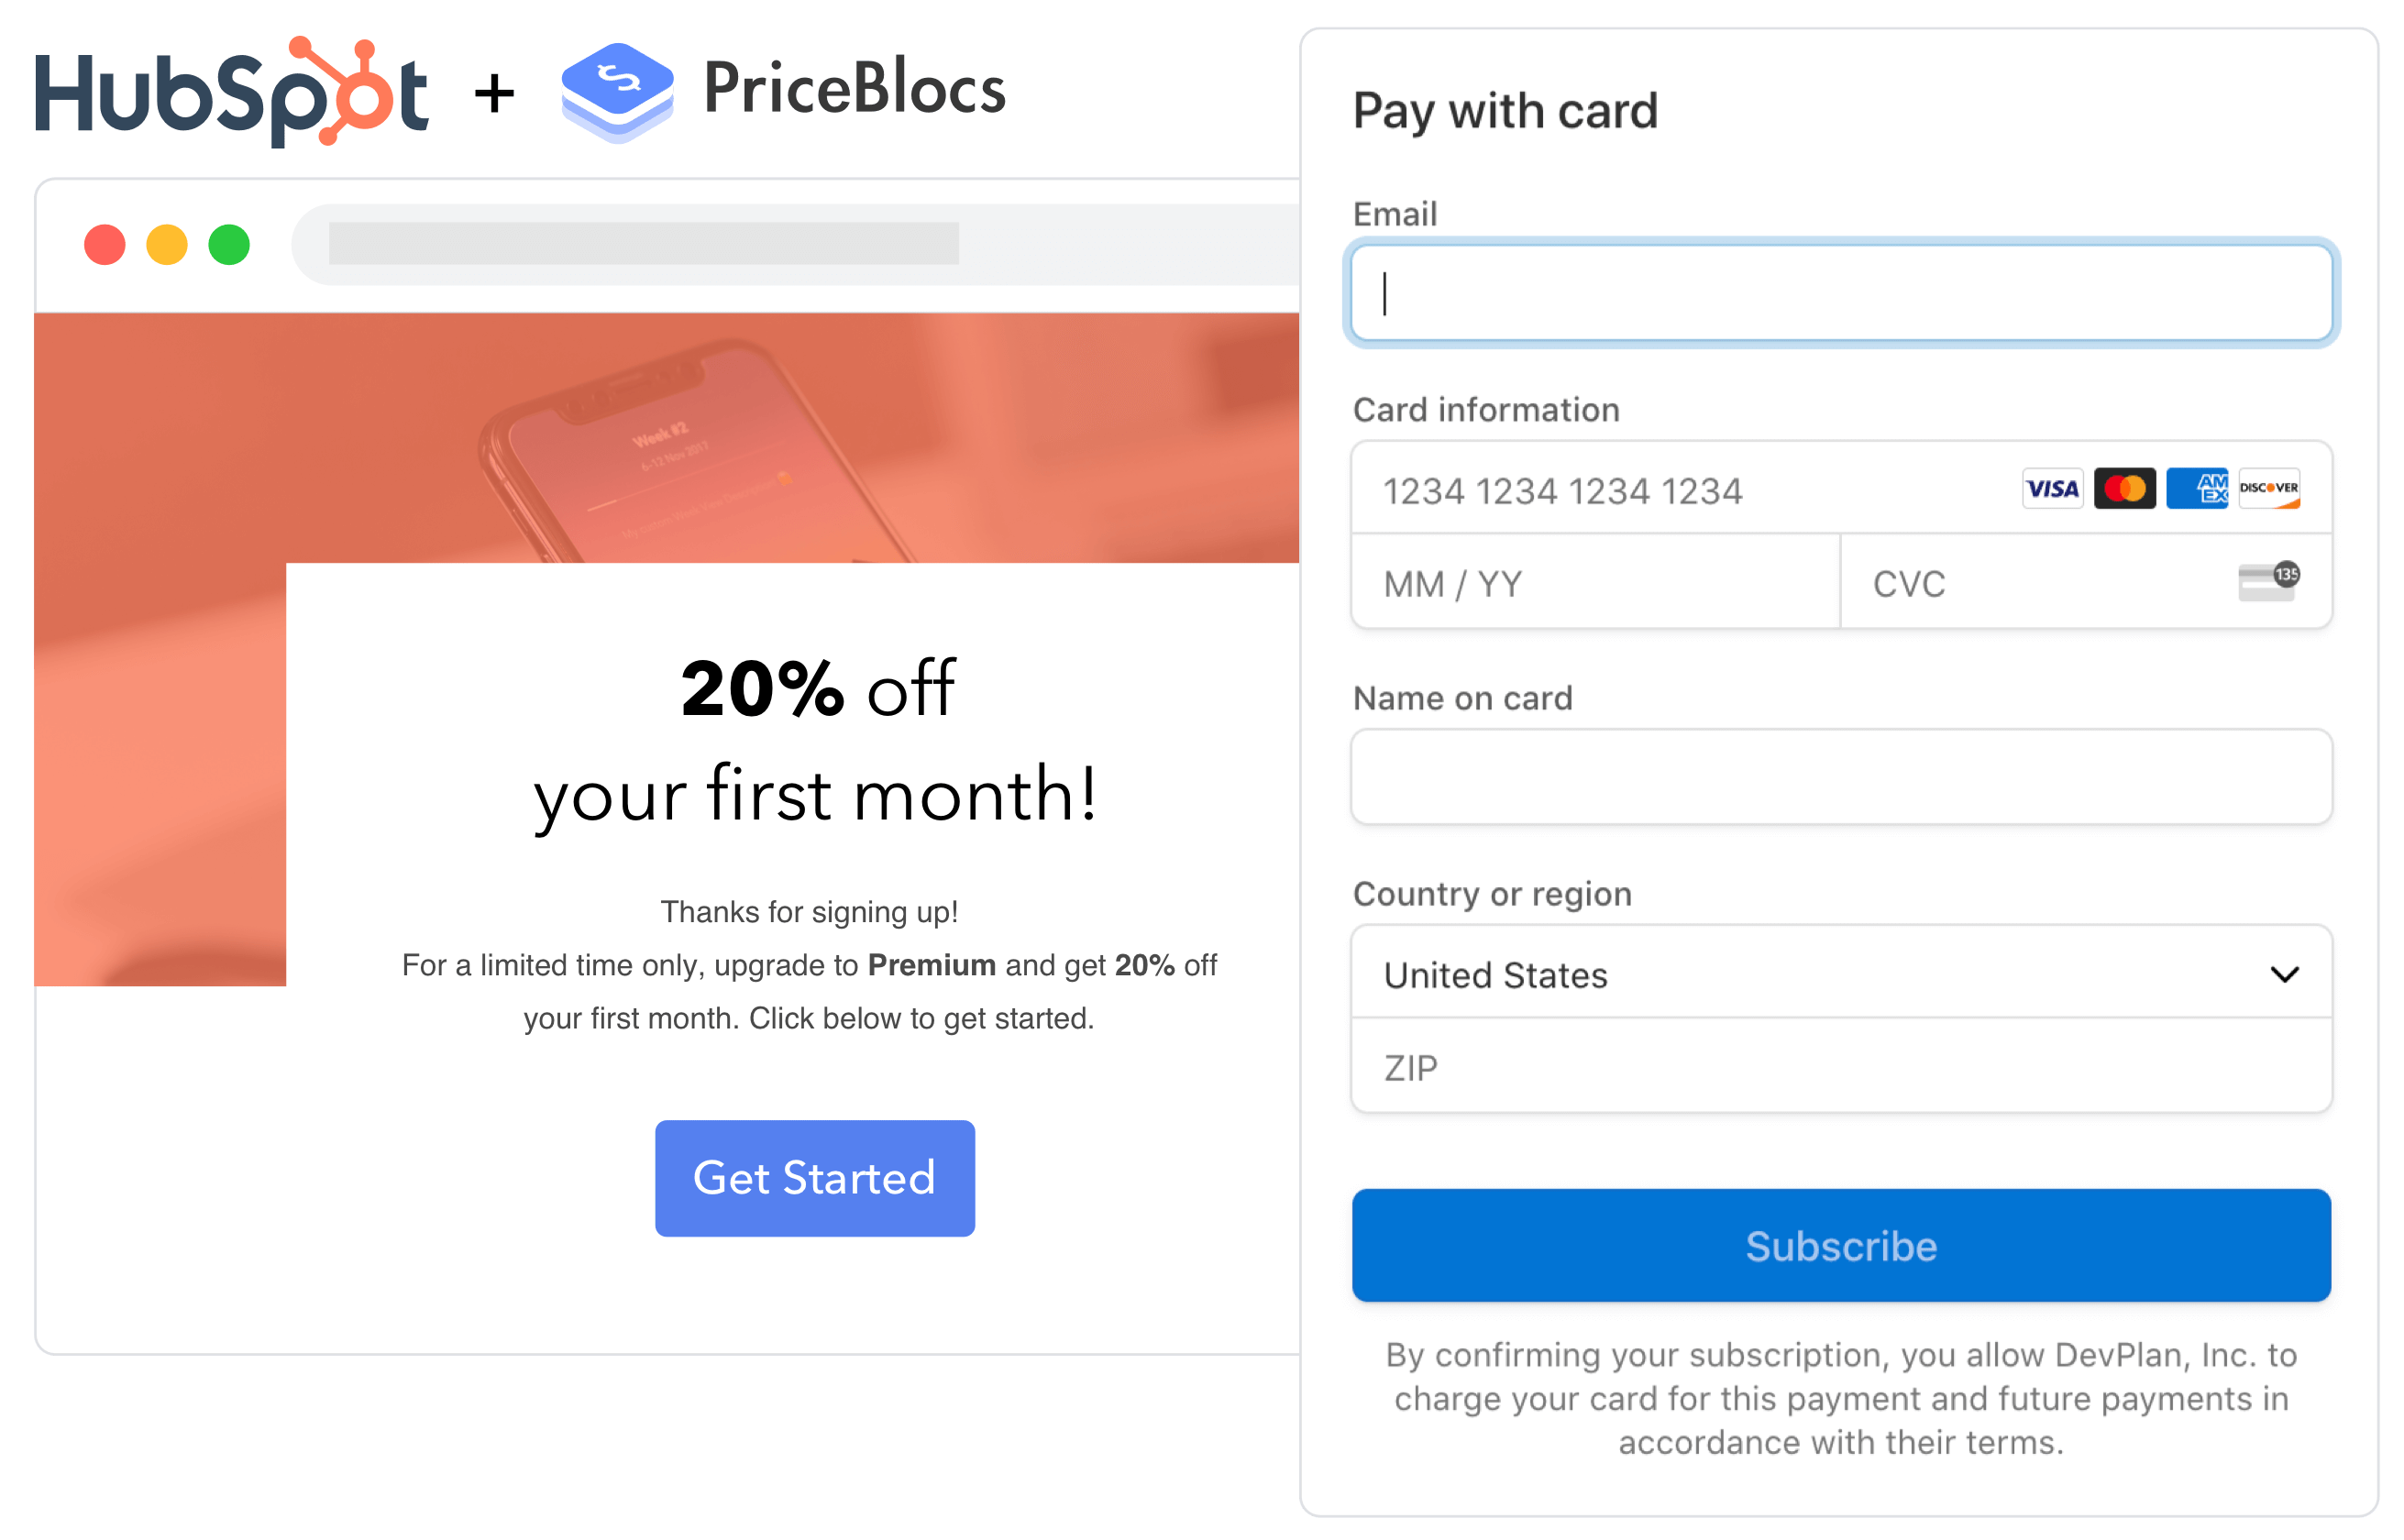
You'll receive an email with the template you've just designed, which includes the CTA with your payment link.
Click the link to test it out!

Adding personalization
Now what if we want to personalize the checkout to the receiver? We can use query string params to personalize any payment link so that the receiver:
- Won’t have to enter their email
- And the sale will be automatically attributed to them
https://priceblocs.com/test/links/_bLNfgxub3XDMr-y-thdR?customer_email=shane@priceblocs.com
How do we do this for lots of receivers at once? That's where we can use HubSpot's personlization tokens.
Personalization tokens
If you’re familiar with HubSpot, you’ll know all about how we can use personalization tokens to embed receiver specific information into a generic email template.
If not here’s a quick summary.
When bulk sending emails, we want to have the option to personalize some of the content (e.g. adding a receivers first name to the greeting in the email). HubSpot’s mechanism for allowing personalization is through the use of personalization tokens. These tokens allow us to pick known values like a users email, and insert them dynamically into the email template.
Using personalization tokens
There is a restriction in HubSpot, where you can't use personlization tokens within standard template buttons.
However you can use them inside of the rich text modules.
Rich text modules are any editable textarea within your email template.
So instead of a button which says Buy now, we will use a simple link which has the personalization token appended to it.
Note: This is not as clean looking as a button, but if you're HubSpot account is on one of the paid tiers which allows for email html template editing, then you can edit the code to achieve the same result covered below, but using a cleaner button instead. Related blog post here
So how do we do use personalization tokens?
- (1) Remove the button from your template and copy and paste your payment link with a blank customer_email parameter appended to it. (example below)
- (2) Click immediately after
customer_email=so that your text cursor is inserting there - (3) Click Personalize in the top right hand corner
- (4) Select Contact from the type dropdown
- (5) Choose email field
- (6) Use a default value if you want of click the checkbox to use the global default value
- (7) Click insert
- (8) You should now see the special personalization token of Email be visible immediately after the
customer_email=text - (9) Done!
(1) Insert payment link with blank customer_email param
https://priceblocs.com/test/links/_bLNfgxub3XDMr-y-thdR?customer_email=
(2-5) Choose the Contact > Email personalization token

(6) Confirm personalization and set a default value
(7) Review personalization token insert
Testing personalization tokens
Before you send another test email, it's important to use the Receive email as specific contact setting.
Without that, your test emails won’t have any personlized contact information, and when you receive an email, there will be no value set after customer_email=
Note: this is only a testing limitation, normal production emails will work just fine.
To perform this test correctly:
- (1) Click on Send test email in the top right hand corner of the email template builder
- (2) Select any contact from the dropdown field for Receive email as specific contact. (e.g. Maria Johnson)
- (3) Click send
- (4) You'll receive an email with the fake receivers email subsctituted in place of where you set the email personalization token.
- It should look something like this
- (5) Click on the link to see the test checkout with the receivers email field prefilled
https://priceblocs.com/test/links/_bLNfgxub3XDMr-y-thdR?customer_email=emailmaria@hubspot.com
(2) Select a contact to receive email as Receive email as specific contact, then click send

(4) Open the email you sent yourself, and see the chosen fake receivers email subsctituted in place of where you set the email personalization token.

(5) Click the link within the email and see the receivers email prefilled within the checkout form
Magic! ✨
Review
In this post we took a look at how easy it is to:
- accept payments directly from email
- and personalize the checkout experience
just by adding a payment link to any HubSpot email campaign. Hope you found it useful!